Manage Static Website Hosting
This guide shows you how to create, test, enable/disable, update, and delete a Static Website attached to a bucket in AIOZ Storage. The flow is UI-only with no scripts required.
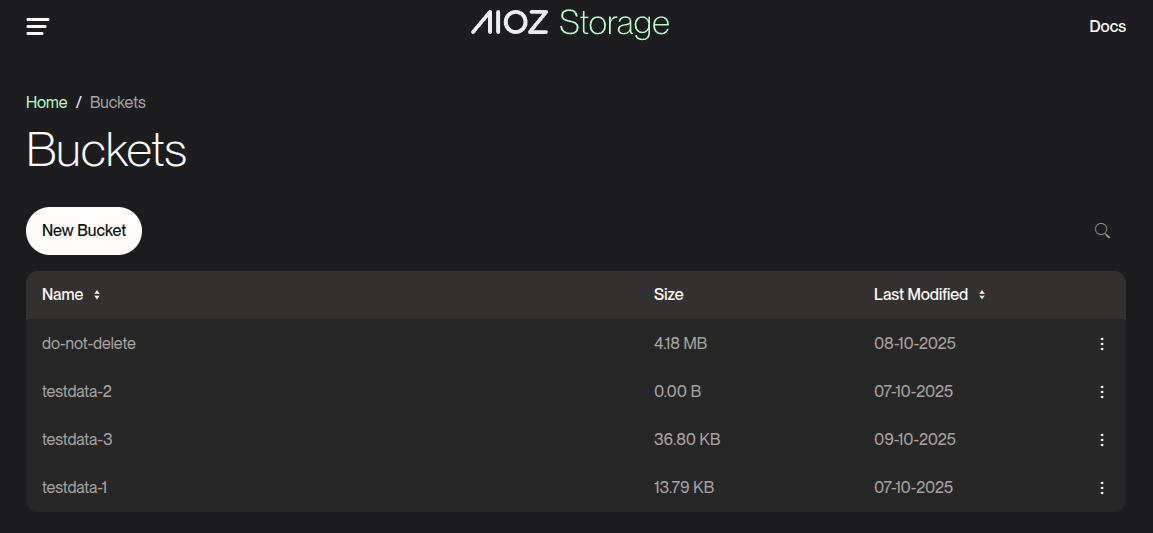
Step 1: Create a bucket
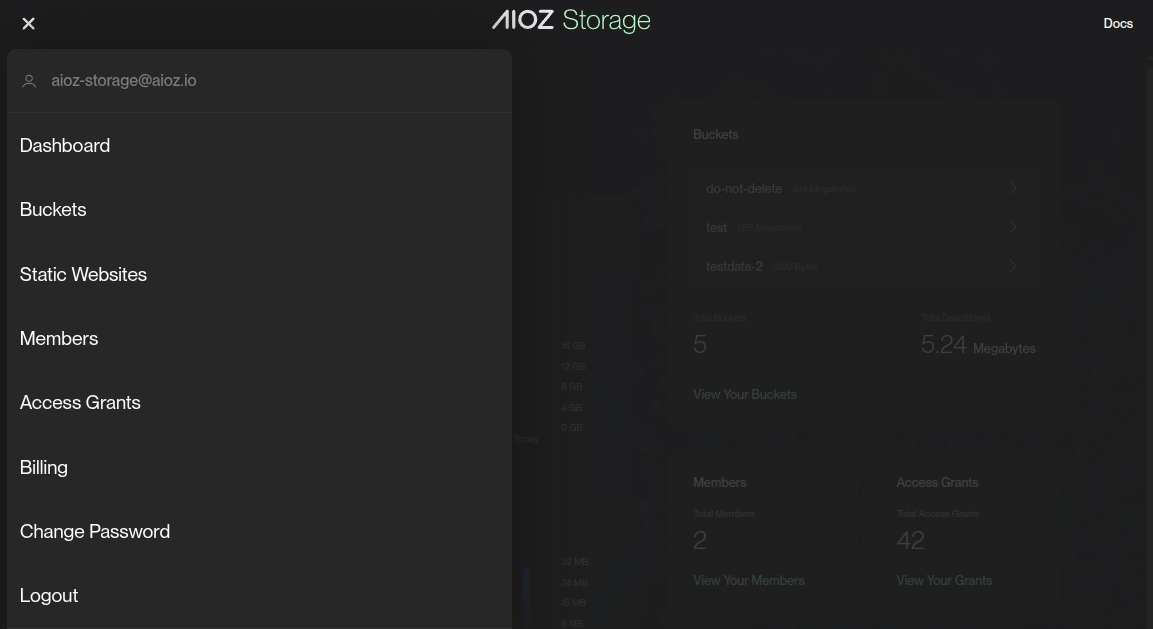
- Sign in to AIOZ Storage.
- Choose the Buckets tab.
- Choose New Bucket.
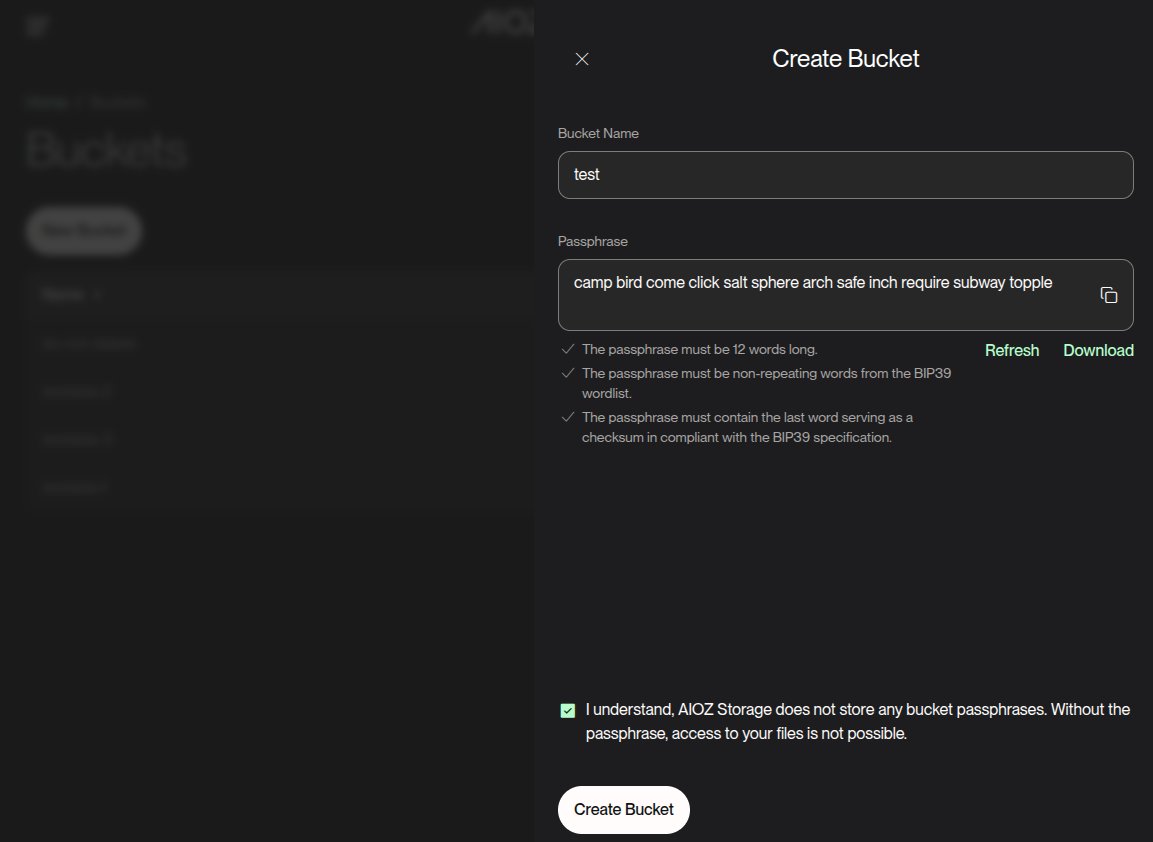
- Enter the Bucket name (for example, example.com).
- Save your bucket passphrase securely. AIOZ does not store passphrases. Without it, you cannot access your files.
- Tick “I understand, AIOZ Storage does not store any bucket passphrases. Without the passphrase, access to your files is not possible.”
- Choose Create Bucket.
Step 2: Create a Static Website for the bucket
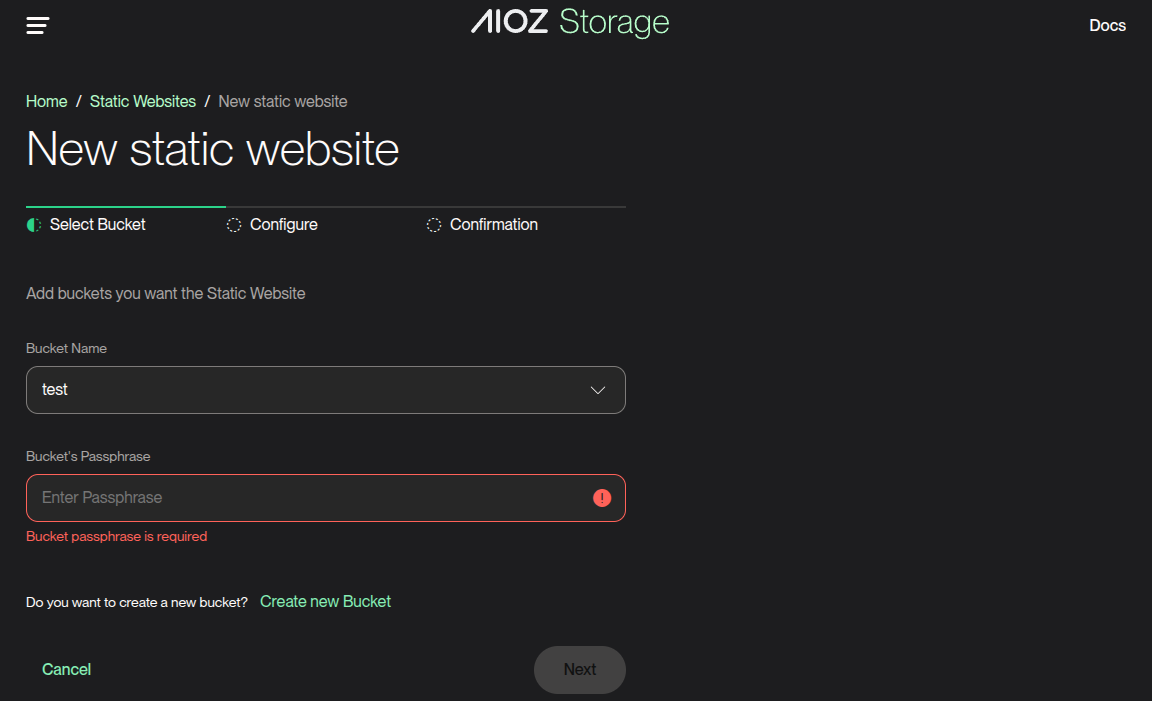
Step 2.1: Select bucket & passphrase
-
Select Bucket
- Choose the bucket you want to create a static website configuration for.
-
Enter Bucket Passphrase
- Enter your bucket's passphrase.

-
Click Next
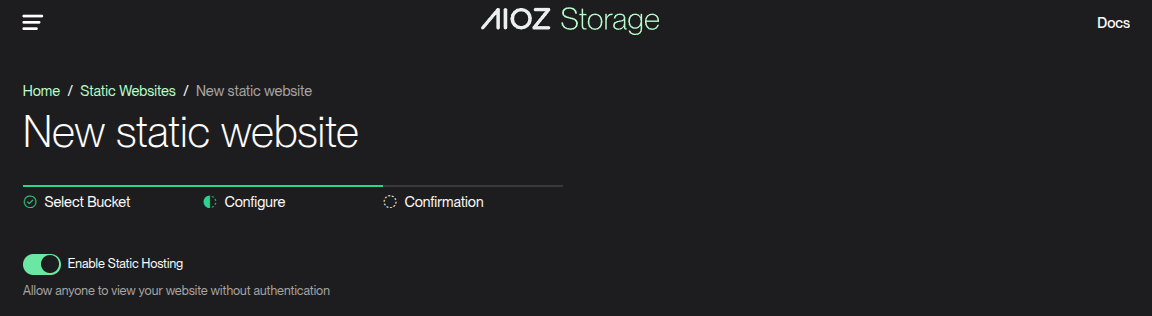
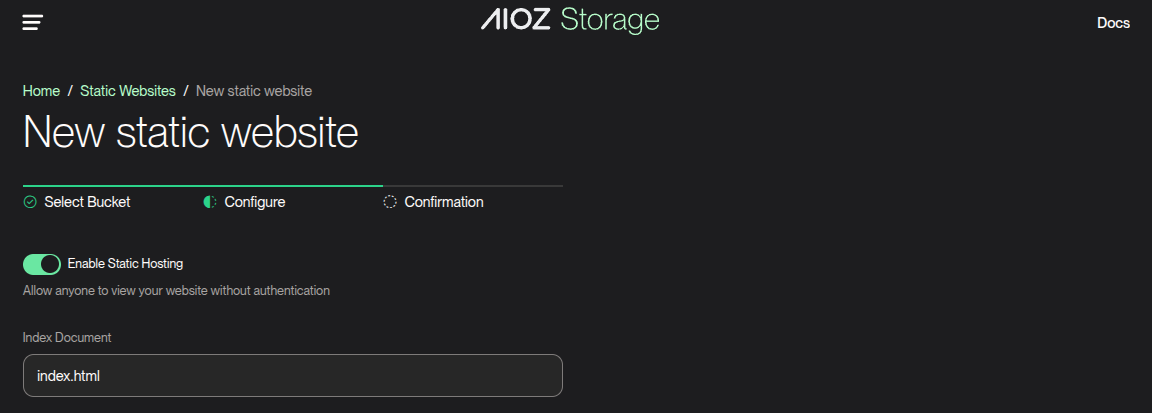
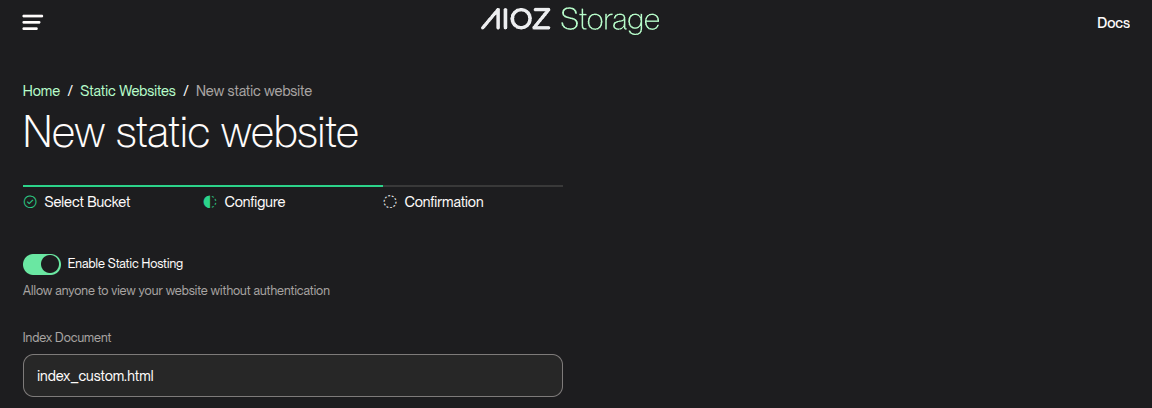
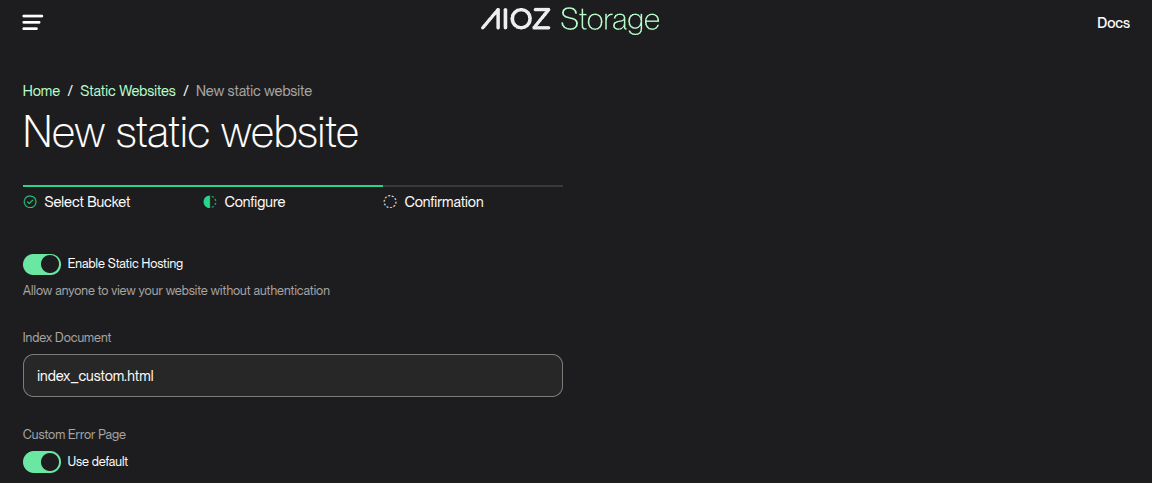
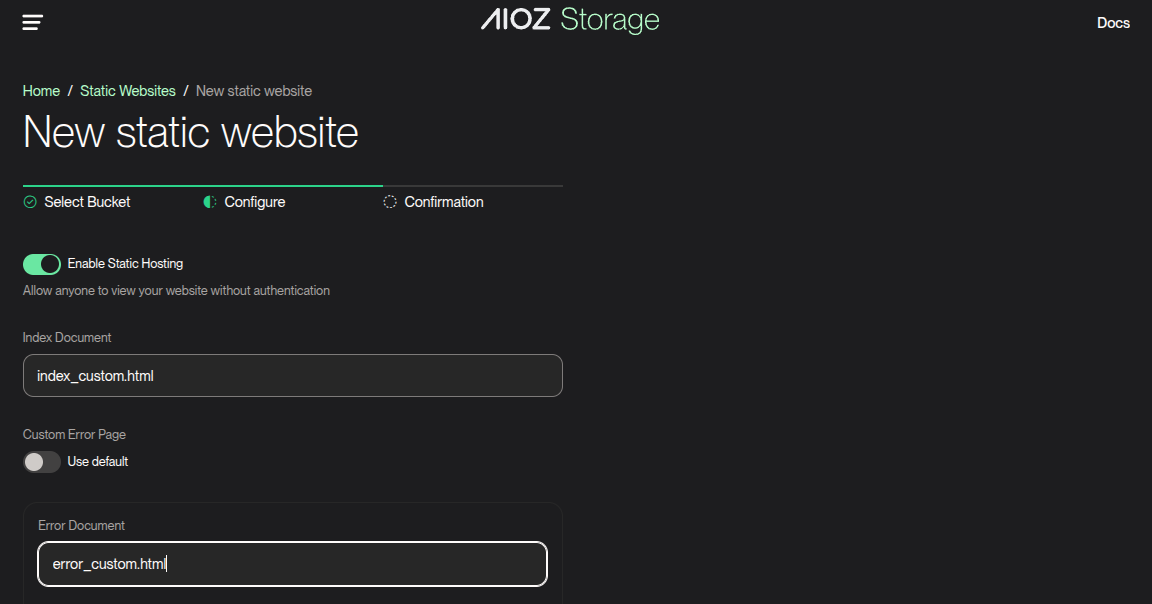
Step 2.2: Configure website
- Enable Static Website
- Index Document
-
Default Index Document filename is index.html.
-
Or specify a custom filename.
-
NOTE: For SPAs, serve Index Document for valid deep links so the client router renders the page.
-
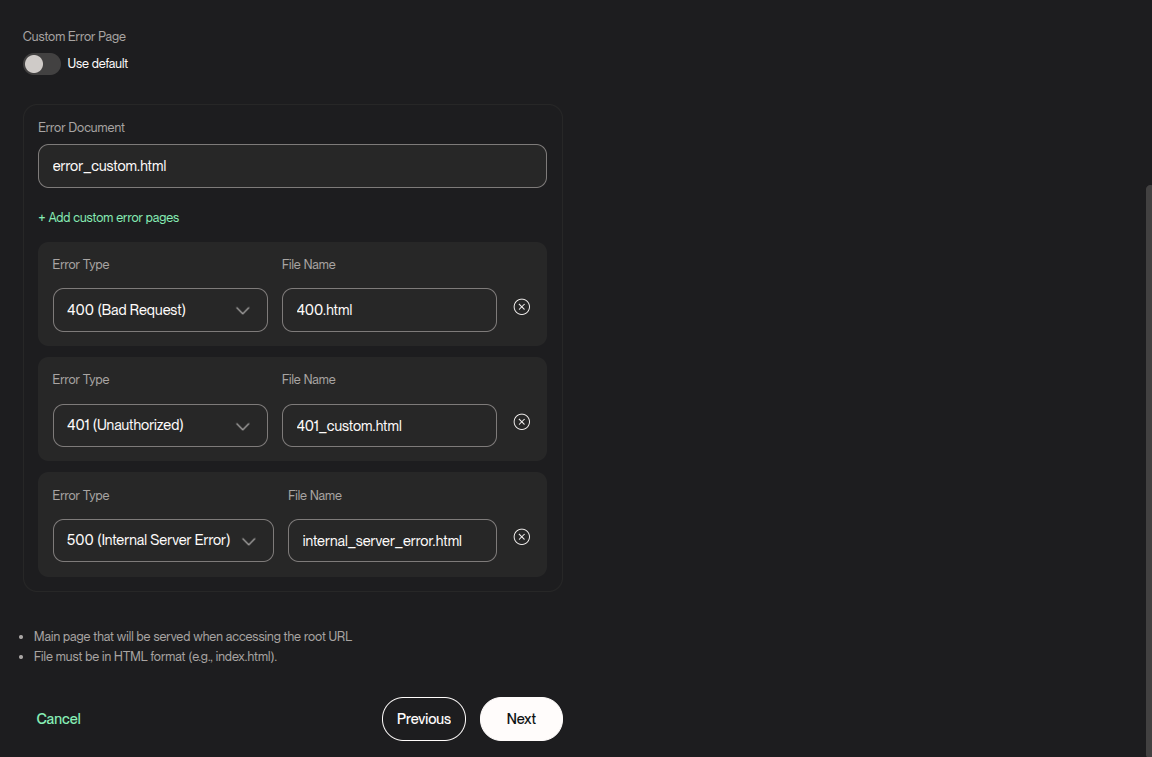
Error Document
-
Use AIOZ default error page
- The system serves a default error page with contextual messages.
-
Use your Error Document
- If an Error Document is set and default is off → the system serves that file.
-
-
Per-status custom error pages
- Add custom error pages for common HTTP status codes (400, 401, 500, 501...).
-
Click Next
Step 2.3: Confirm
- Review the static website configuration.
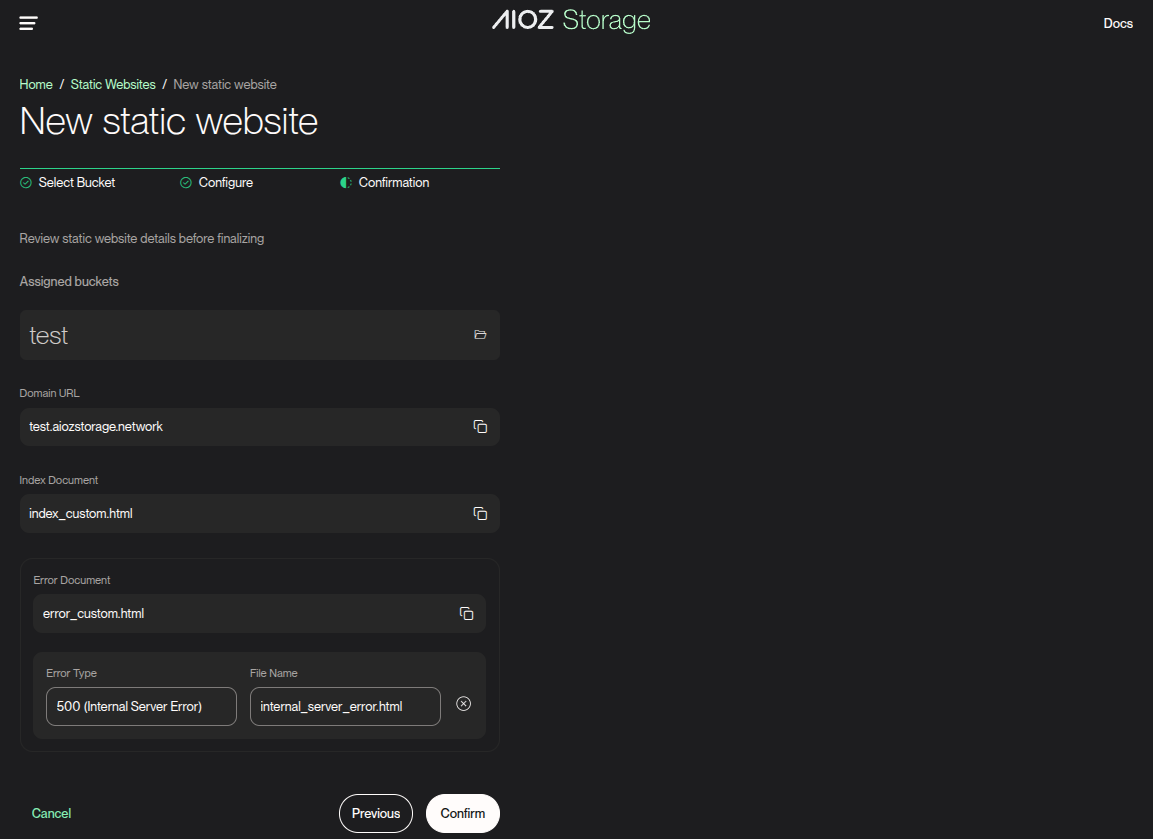
- Choose Confirm to create a new static website.
- Return to the Static Websites page.
Step 3: Test your website endpoint
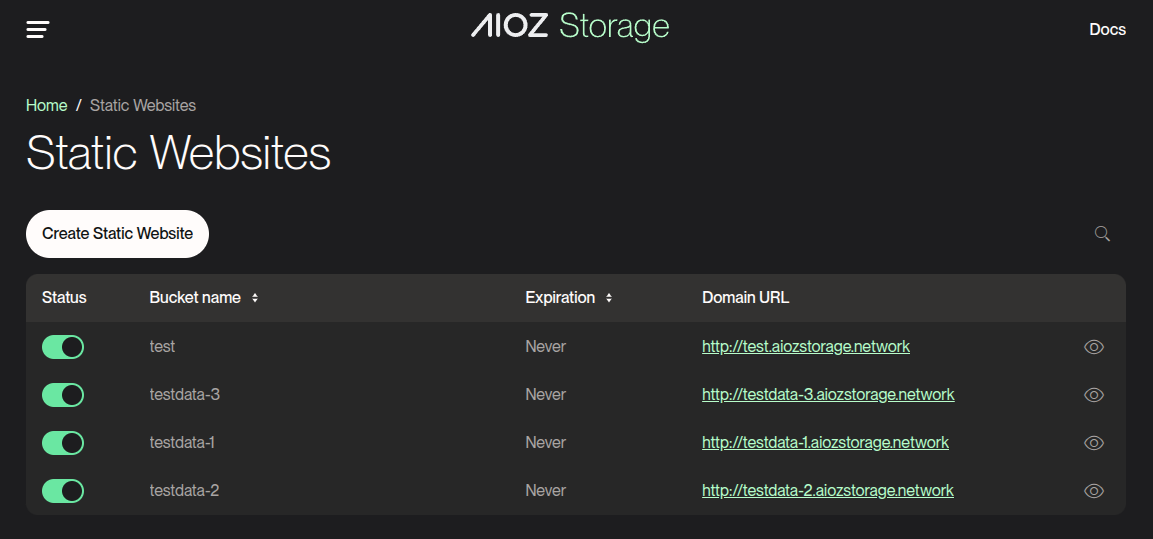
After creating a new static website configuration for a bucket, you can access your website via a mapped domain provided by AIOZ Storage (e.g., 'https://<bucket>.sites.aiozstorage.app' ).
NOTE: Reserve Error Document for true 404s. Test deep links directly.
Step 4: Manage static website configuration
NOTE: Ensure your bucket name does not contain dots (.). SSL certificates for domains cannot be issued for buckets with dots in their name due to certificate security limitations.
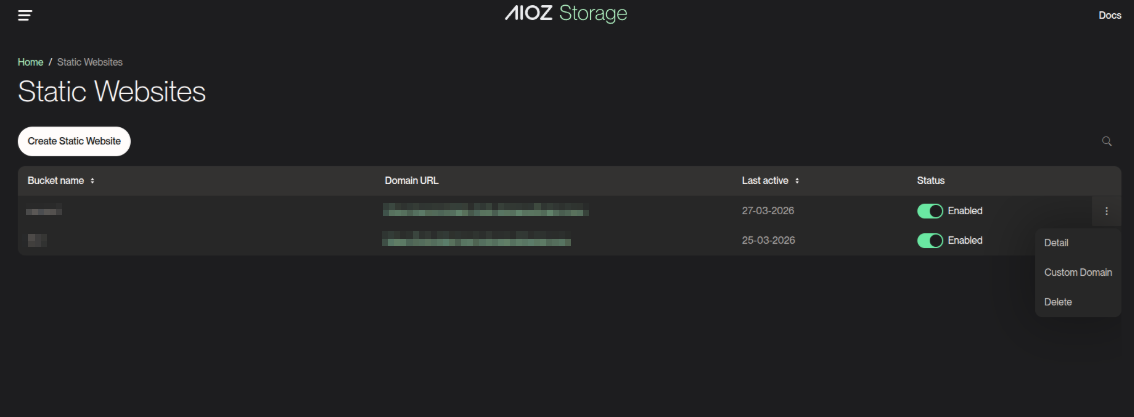
- View Static Websites
- View static website details
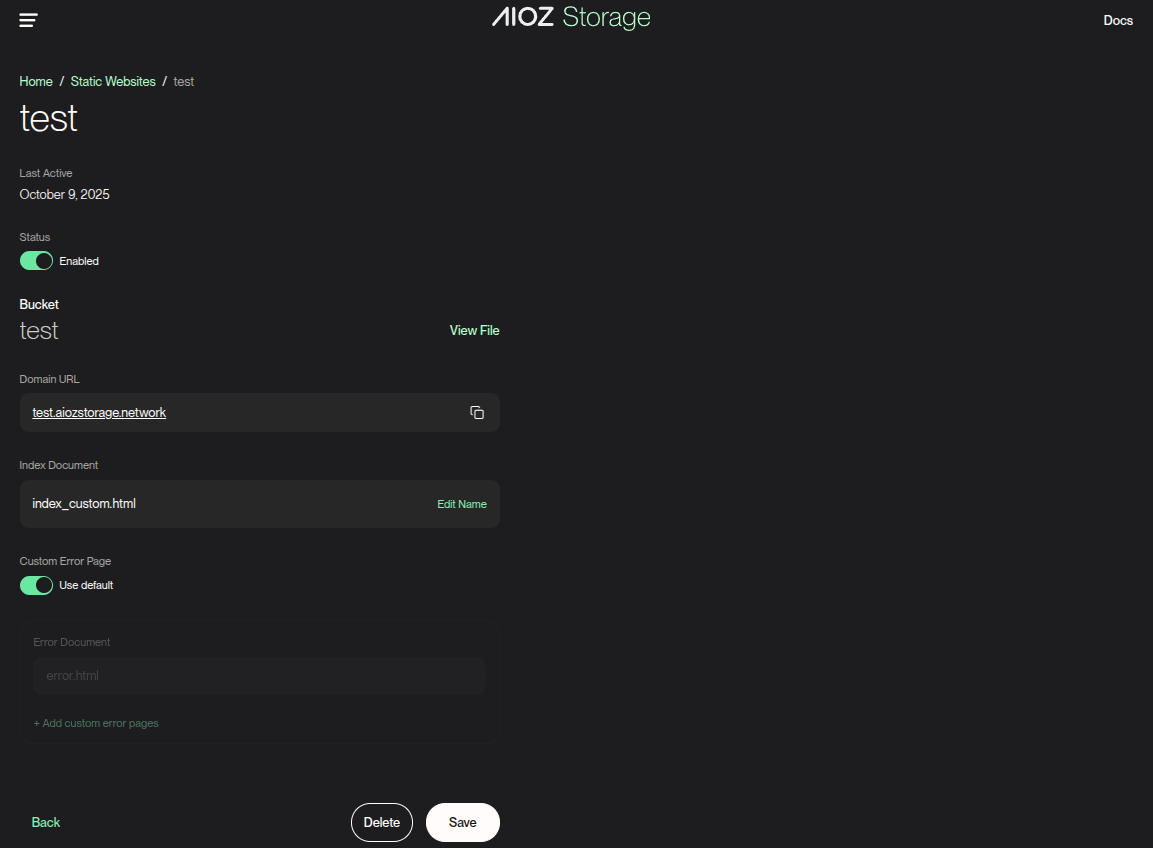
- Edit the static website configuration
+ Enable/Disable the static website
+ Update Index Document
+ Turn “Use default error page” On/Off
+ Add/remove per-status custom error pages
+ Delete static website configuration
Step 5: Delete the Static Website
Delete the Static Website configuration only
The Static Website is disabled for this bucket. The website endpoint no longer works, but the bucket and all existing objects remain unchanged. Only the Static Website configuration is removed.
- Choose Delete and enter the bucket’s passphrase
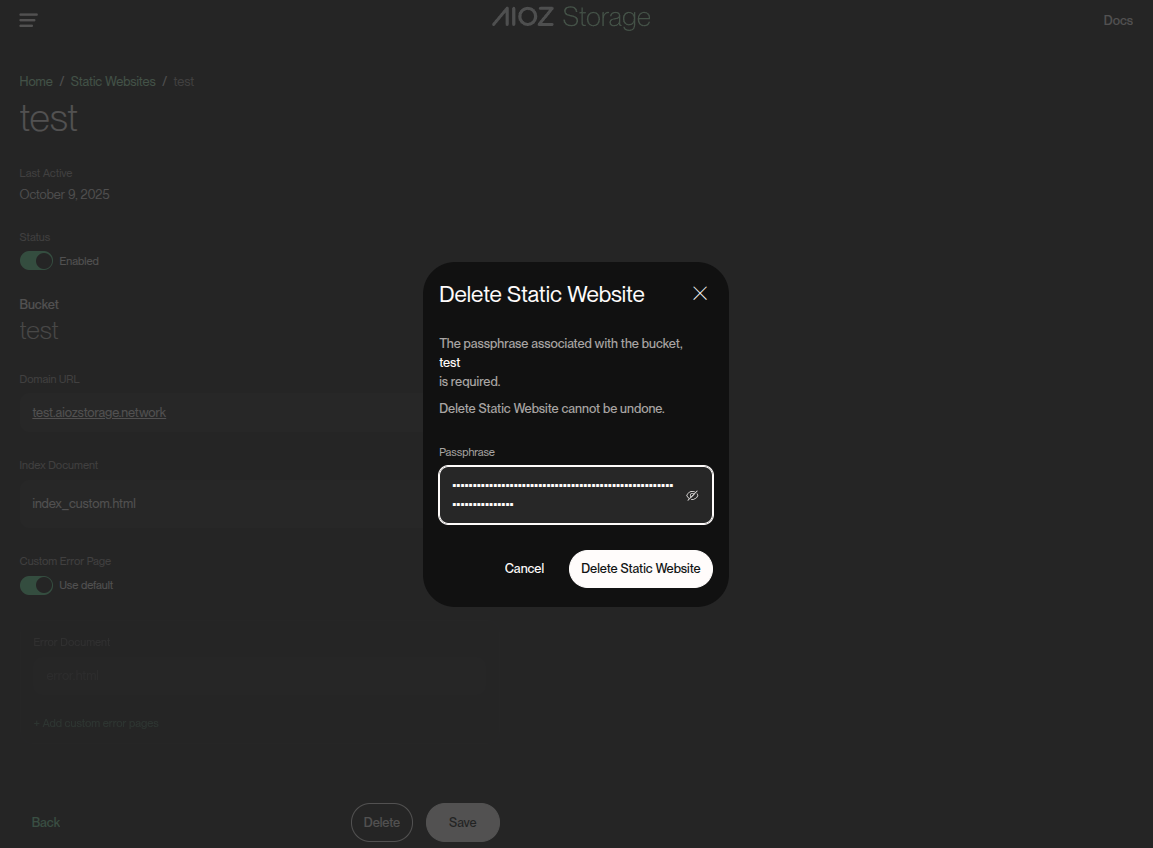
- Choose Delete Static Website
Delete the entire bucket
This permanently removes the bucket, its objects, and the static website configuration. The Static Website becomes unavailable.
- If a bucket is deleted, it can't be restored by AIOZ. Before deleting a bucket, make sure that you have backed up or replicated your data.
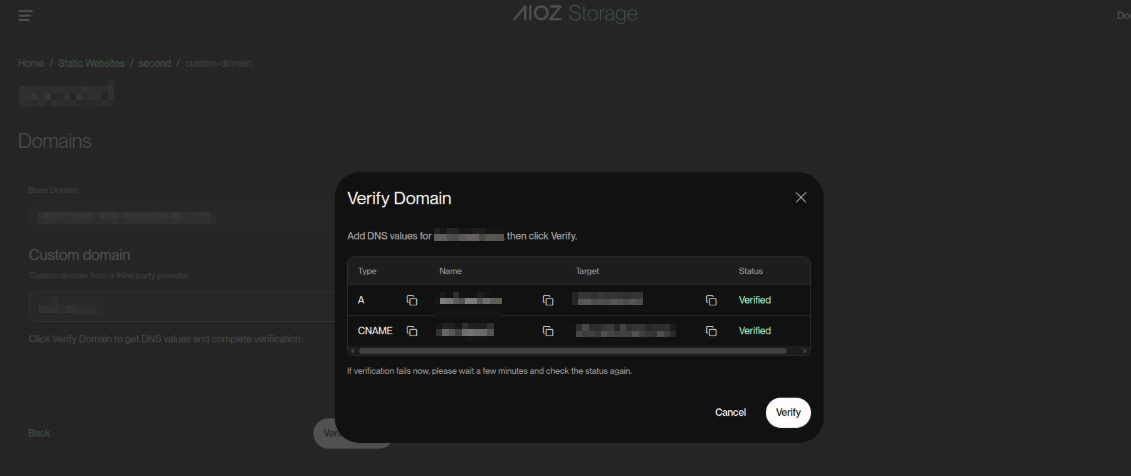
Step 6: Verify Domain
Before you start
Before verifying your custom domain, make sure you have access to your DNS provider and permission to add or update the required DNS records.
- You must be able to create or edit A and CNAME records for the domain.
- If your domain uses Cloudflare, set the verification records to DNS Only (grey cloud). Proxied records (orange cloud) may prevent the system from detecting them correctly.
To ensure security and prevent domain hijacking, AIOZ Storage requires you to verify that you own the custom domain before it can be linked to your bucket.
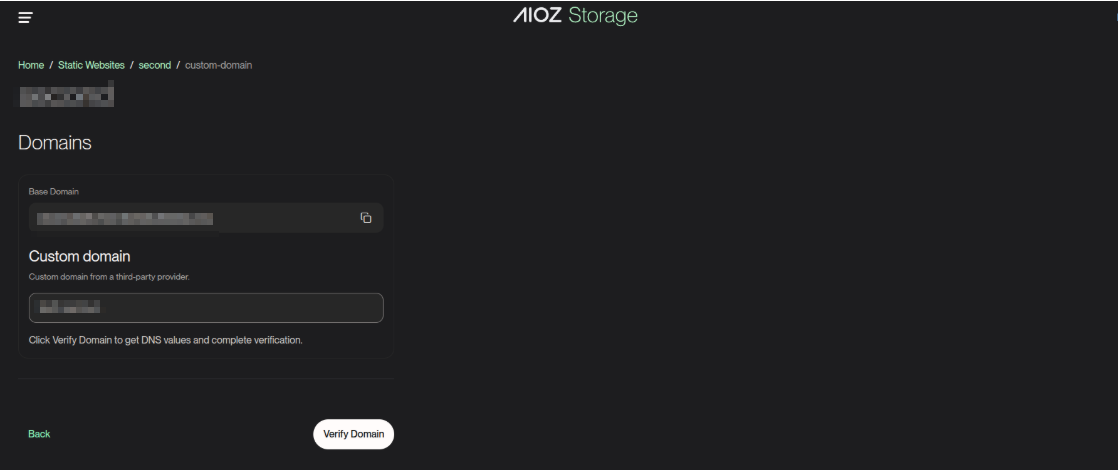
1. Navigate to Custom Domain
After creating a Static Website configuration, open Custom Domain from your website settings.
NOTE: You can quickly access this via the Static website is live status or the action menu in the Static Websites list.

2. Add Your Custom Domain
- Enter your custom domain (e.g.,
www.yourdomain.com).
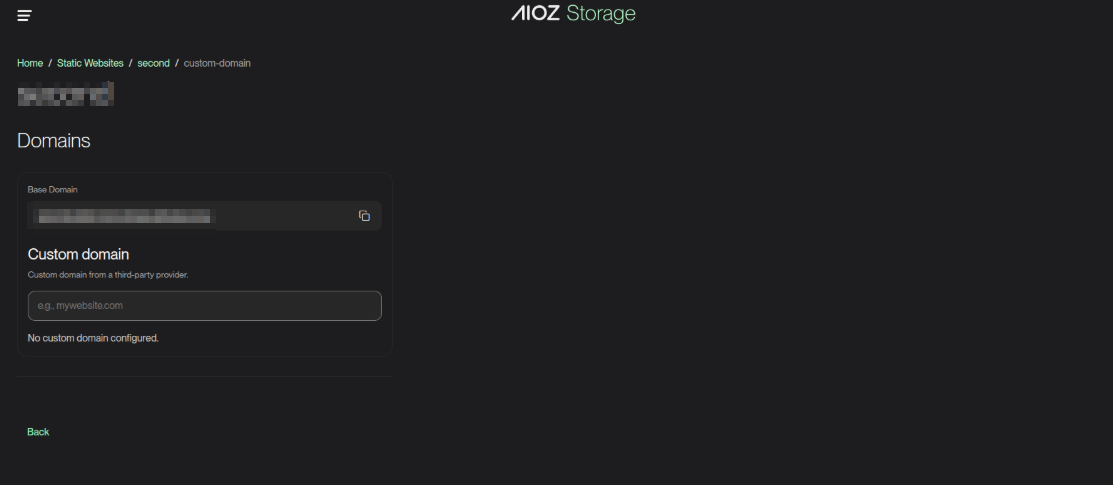
- Click the Verify button to initiate the process.
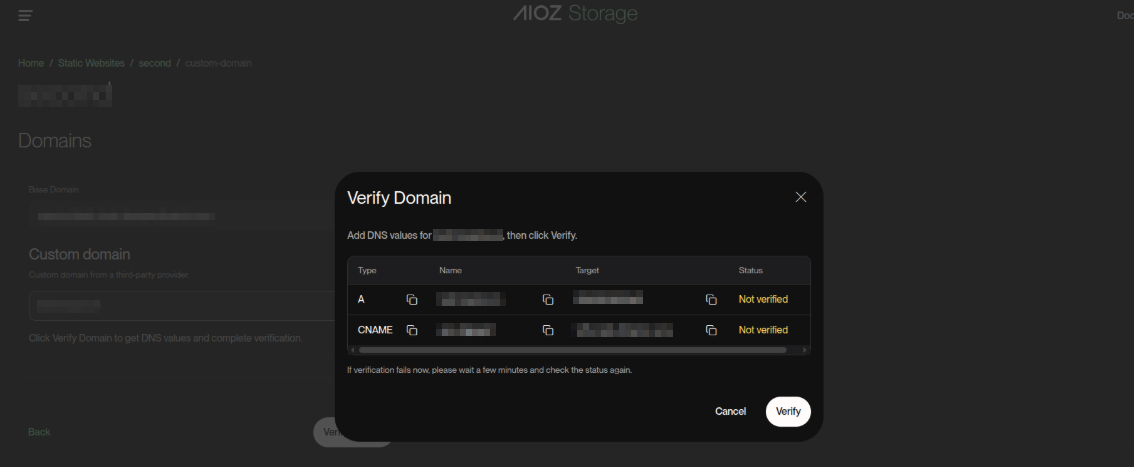
3. Obtain Verification Records
Once the domain is added, the system will generate unique verification records. You must add these records to your DNS provider's dashboard (e.g., Cloudflare, Route53, GoDaddy, or Namecheap).
4. Understanding the Verification Process
The system checks two types of verification:
- Ownership verification using the required CNAME record.
- DNS resolution verification using the required A record.
NOTE: You only need to click Verify again if the process has stopped or after correcting your DNS records.
- Not verified: If the required DNS records are not detected yet, the status will remain Not verified and may show an error message.
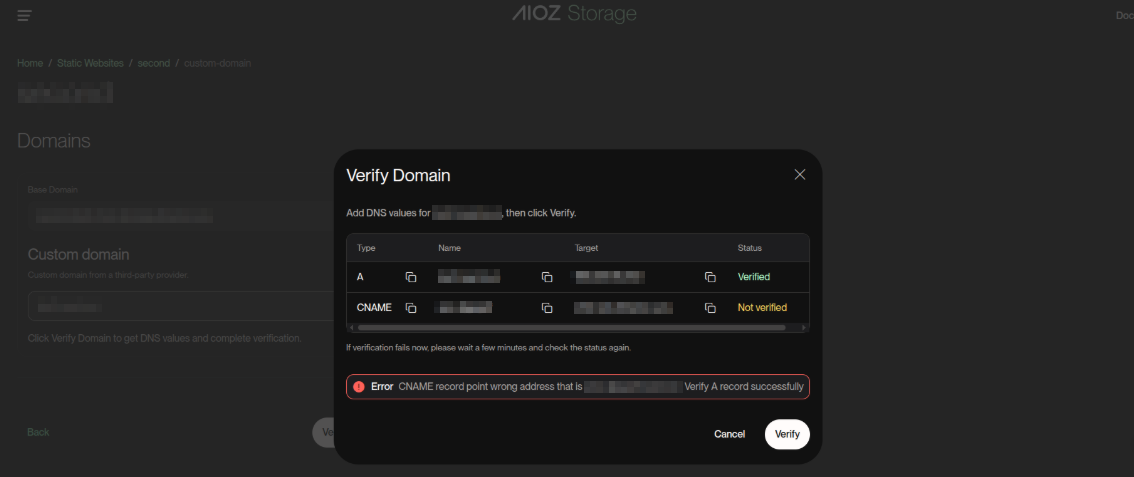
- Manual re-check: After updating your DNS records, click Verify again to run another verification check.
- Verified Successfully: Your domain is fully ready when both status rows show Verified.
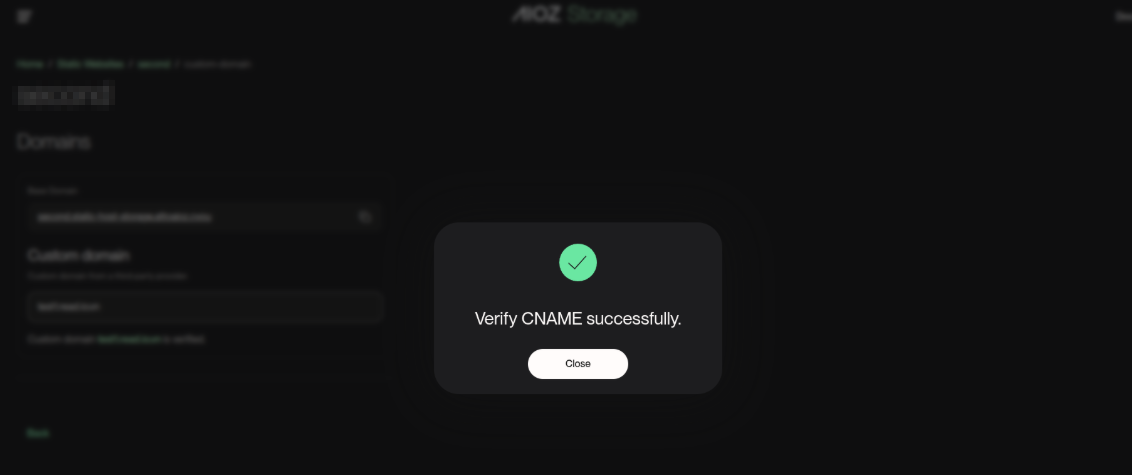
5. Completion
When the verification is complete, your custom domain is successfully linked and active.
NOTE: You can confirm success when both records are Verified and the custom domain appears as Active in the domain settings.
If you use Cloudflare, please set the Proxy Status to DNS Only (Grey Cloud) for the verification records. Our system cannot detect the record if it is hidden behind Cloudflare's proxy (Orange Cloud).
Automatic Verification Process
- Initial Check: Runs when you first click Verify.
- Automatic Re-checks: If records remain unverified, the system keeps checking them in the background automatically.
- Max Retries: If verification still fails after the retry limit, fix the DNS records and click Verify again.
Troubleshooting Tips
- Propagation Delay: DNS changes may take a few minutes to several hours to propagate.
- Record Type: Make sure you added the correct A or CNAME records.
- Typo Check: Confirm the Host and Value/Target fields exactly match the dashboard values.